
Solder instruction and circuit of the USB IR receiver
As mentioned at the introduction, the construction is not that easy as for the serial IR receiver, but it should not be a big problem for an amateur solderer to solder the circuit referring to the following instruction. Since I wanted to build up everything as small as possible, it took me quite some time fiddling around to develop the following circuit.
Update: The USB infrared receiver is now also available with Remote Control Power ON/OFF feature in this guide, or check all latest guides in the modding section.
But first let me explain a bit the function of the components, because the one or the other could be rather interested to know about the effect of a single component.
Function of the components …
According to the former IR circuits I used for this one also the TSOP 1738 as IR receiver, which is connected to a 5 volt power source at pin 2. Pin 3 of this 38 kHz IR receiver is the output for the received signal and, last, but not least, there is even the connection for GND at pin 1. With the 4.7 µF Elco, the 10 µF Elco and the 100 nF capacitor the basic power supply is smoothed by a multi level absorption of peaks in the power supply of the USB connection. Further on there is the 1.5 k resistance, which works as a pull up resistance between the negative data line and the 5 volt power supply of the USB connection with the purpose to stabilize the logical signal. The very core of the USB receiver is the programmed Atmel IC, which is here operated with a 12 MHz quartz and performs the communication between the PC and the IR receiver. Altogether not too complex, yet not really as simple as the former serial Infrared receiver.
Let us now quickly move to the wiring diagram, which – due to the finding of the optimal arrangement of the single parts – took me more time than expected.
The wiring circuit …
(to enlarge the image click on the circuit)
How to solder all together …
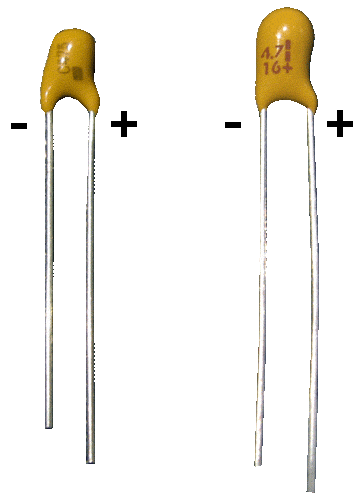
First of all we take the parts one by one and fix them to the PCB (referring to the next image), while fixing the two capacitors with the plus (+) pole up !!!
Here’s a picture of the different Tantal capacitor types with the right pinout:
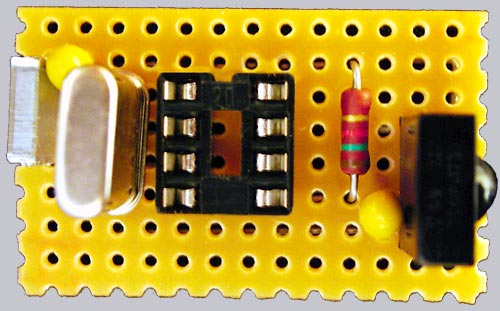
Fix the IC socket with the little notch up (also shown on the image). This notch is the orientation point to fix the IC correctly later on.
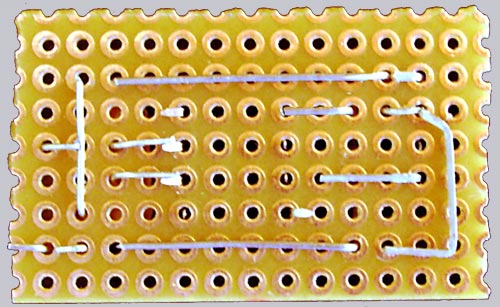
Here we have a plotting of the backside of the PCB to see in which direction cables have to be bent and how long/short the wires have to be to fit to the following solder process (the notch of the IC is now down !) At this point I have to intend on inspecting everything 3 times to avoid a wrong soldering !!! Obviously this is the most annoying part of the whole work, but conscientious preparing is indeed the most important part, because we avoid mistakes, which are later almost impossible to cancel. The soldering iron can already be heated during this work, because we will start in a second 🙂
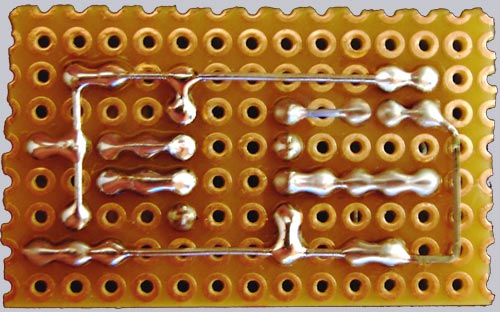
Now we simply solder all positions as described in the following image. If possible do not solder more spots than necessary, because afterwards we want to fix the USB cable.
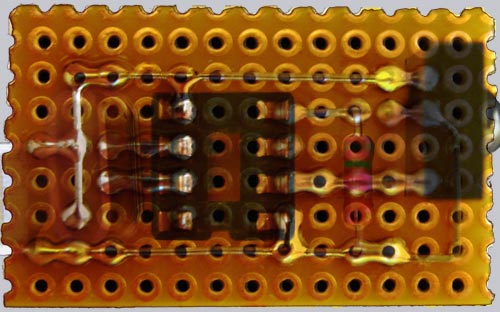
In order to get the positions of each part clear I created an overlay of the upper and lower part of the PCB to have them both in one view.
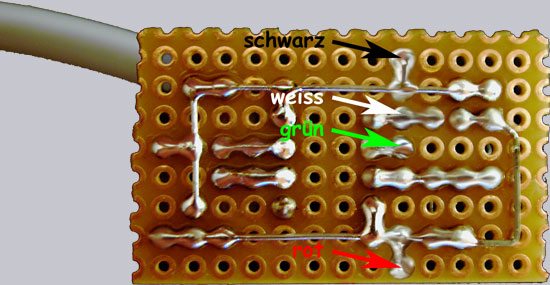
At last we solder the 4 wires of the USB cable with black = GND, white (or yellow) = data (-), green (or blue) = data (+), red = VCC + 5 volt.
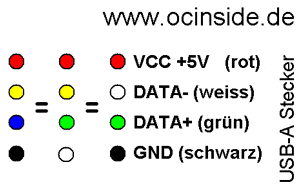
Sometimes USB cables have different colors. Here is a table with some possible USB cable colors (just in case your cable is NOT red, black, white and green):
This is the finished lower part of the soldered PCB without the green arrows.
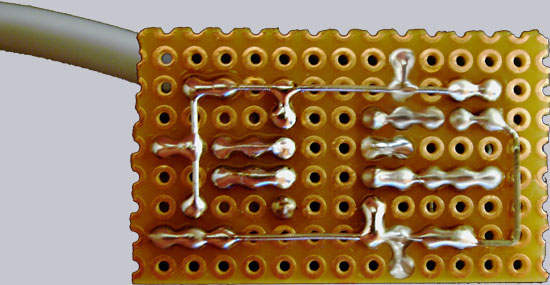
This is again an image of the finished USB receiver with USB connection cable.
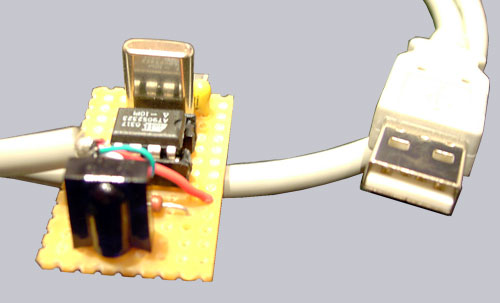
That’s it 🙂
Best will be – for a last time – to check again all connections and the positions of the capacitors. Fix now the IC with the notch placed to the free space of the IC socket before plugging in the USB plug and the following installation of the drivers. Additionally I recommend you to use a shrinking tube or a piece of tape to isolate the lower part of the PCB, whereas I treated the kit in the fanshop to a piece of shrinking tube, which is covering exactly the whole PCB with all single parts. The vault of the infrared receiver may of course not be covered, because this is the receiving part !!!
Continue with the necessary drivers for the USB infrared receiver and the installation …


